

Photo by Peter Gombos on Unsplash
Open-Source Contribution Guide: Mastering Best Practices for Impactful Collaborations
From Novice to Contributor: Learn the Strategies, Etiquette, and Tools for Making Meaningful Open-Source Contributions


As new developers, we all want to be involved in the open-source community, to do that we need to show our passion to them by making some contribution to projects.
So to make a contribution we should follow some basic guidelines, which make the life of the maintainer easy.
Creating an new issue
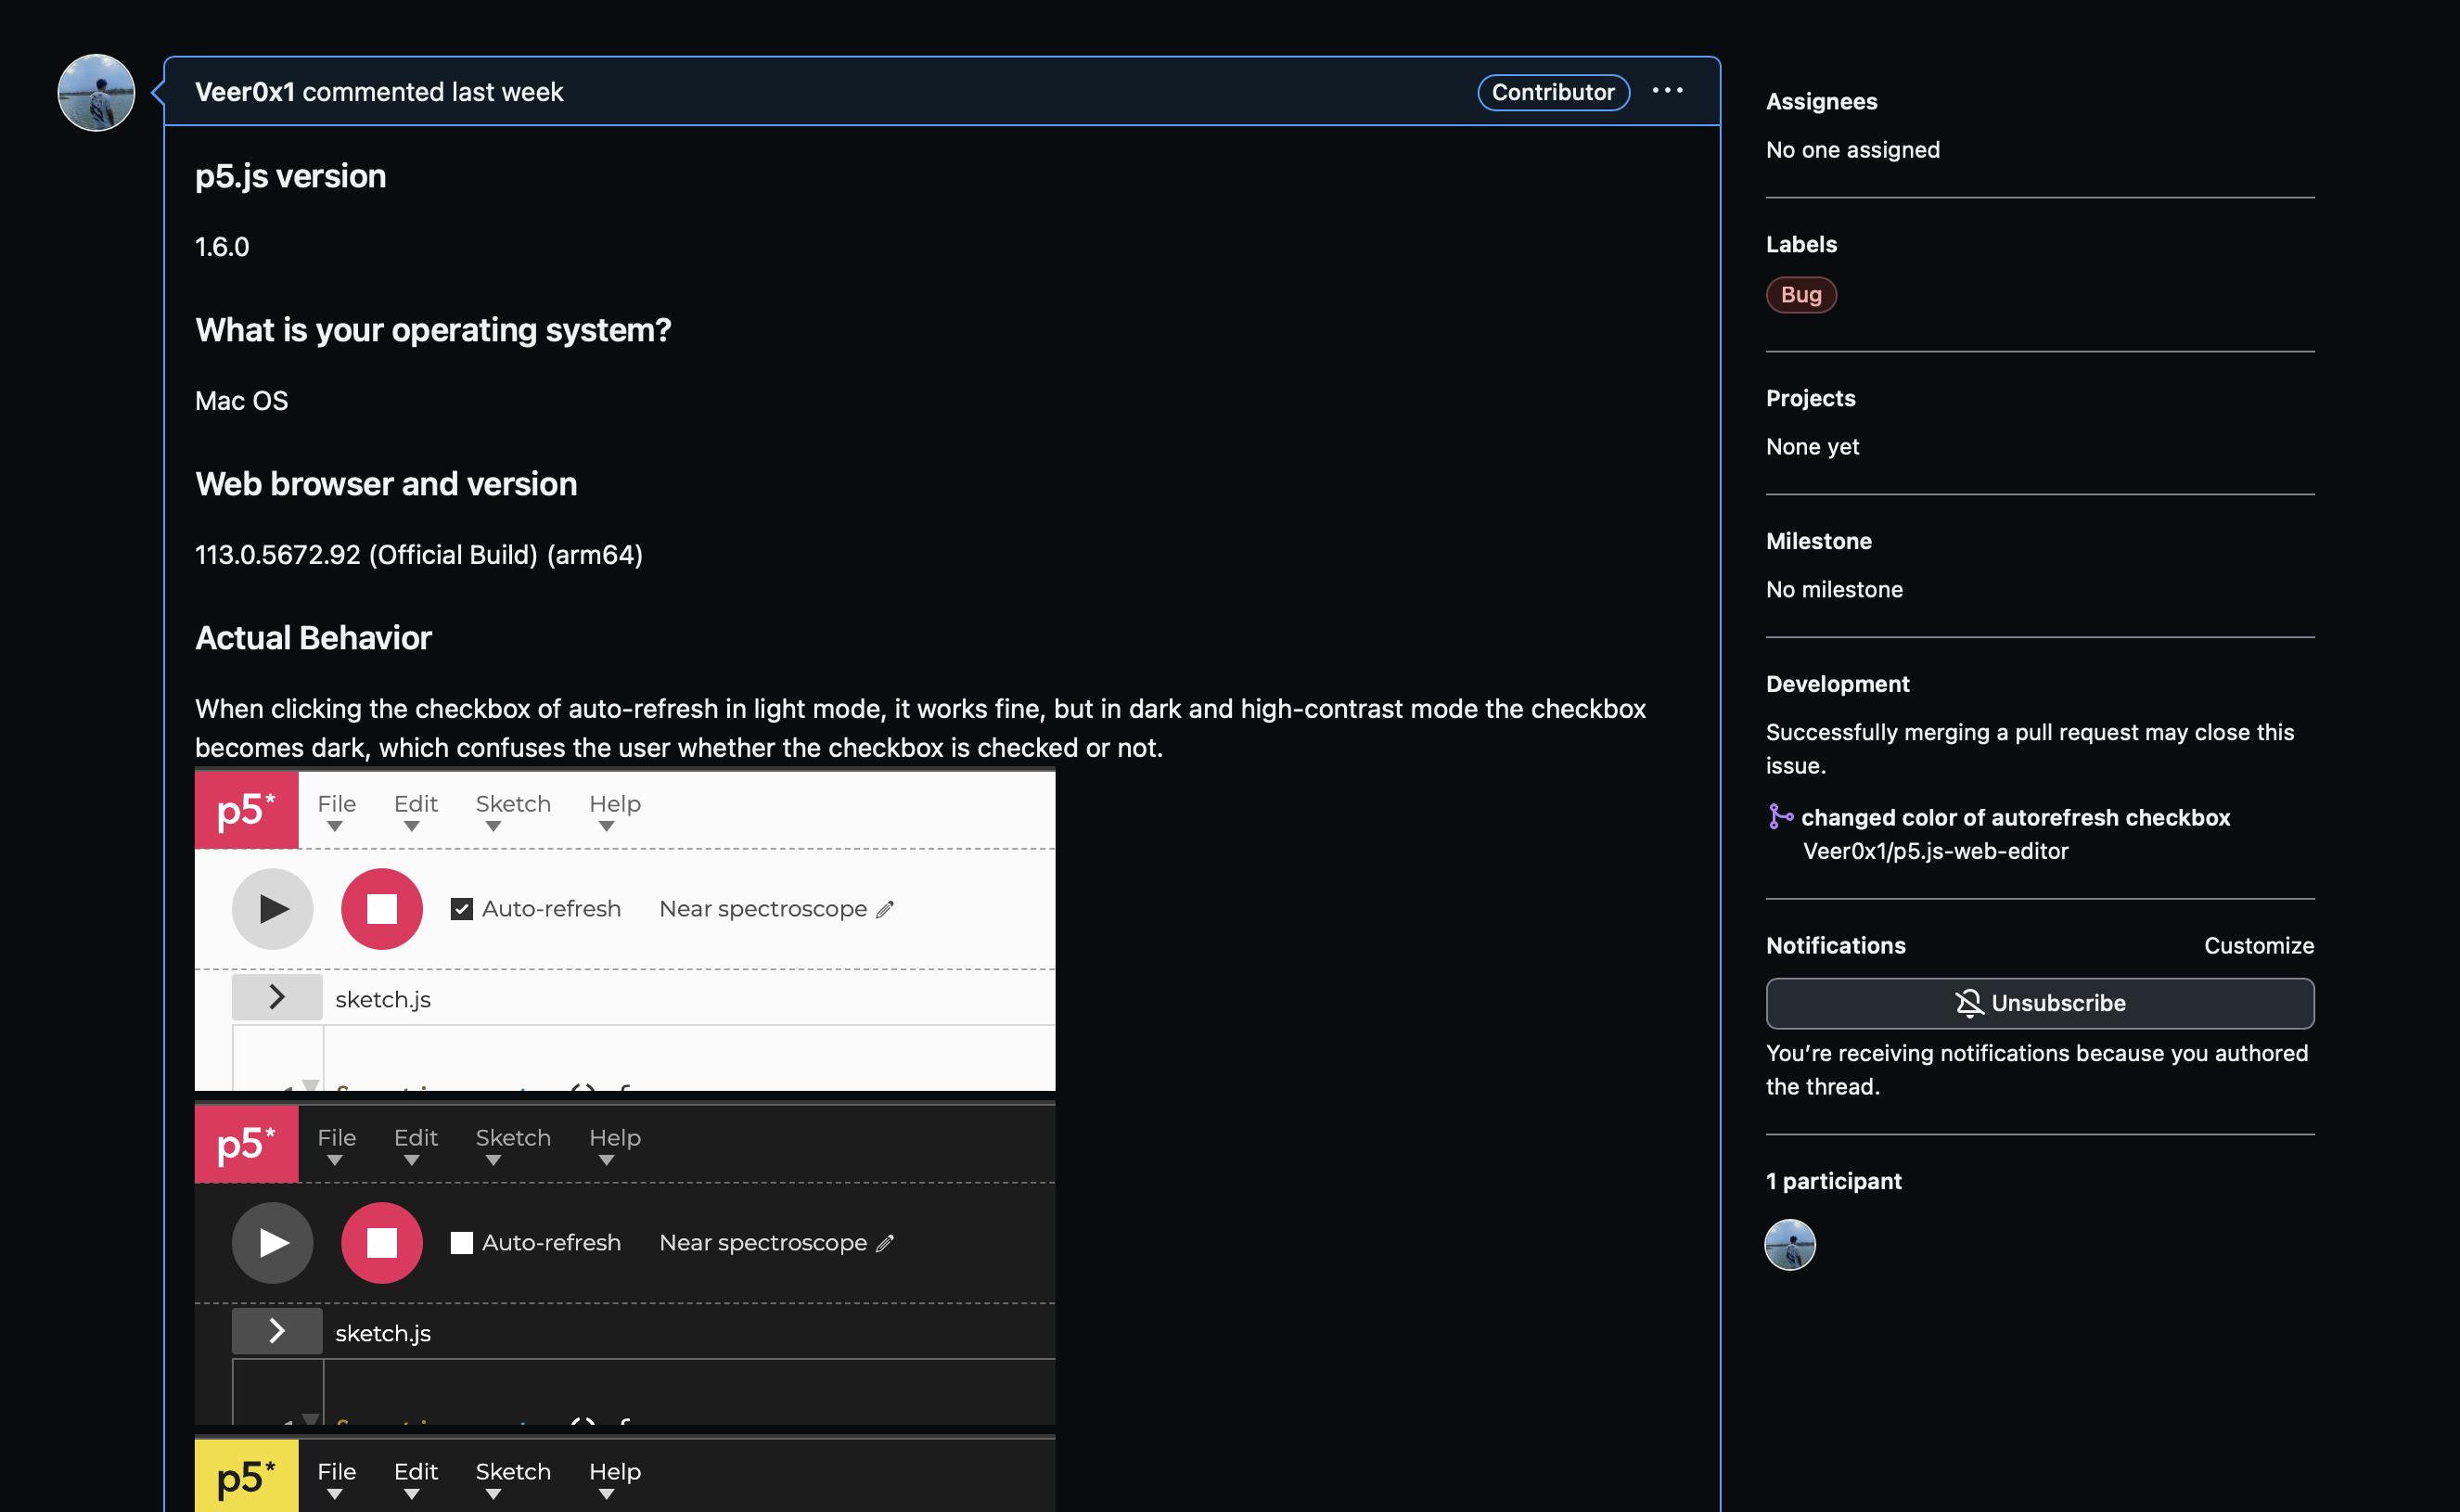
Whenever you found some bug in code, you should first create an issue and properly explain it. Most big open-source projects will have their template for creating a new issue, make sure to follow the instructions in the template and provide the required information(so that your issue doesn't create issue for other😅). This will make understanding an issue easier for to rest of the community. Which will lead to a path for discussion about the issue.
The issue should contain the following information:
What version of the project you're using
Your device (Desktop, Tablet or Mobile phone)
What is your operating system?
Web browser and version
Actual Behavior
Expected Behavior
Steps to reproduce
Let me share the screenshot of latest issue to understand it better


Raising a Pull Request
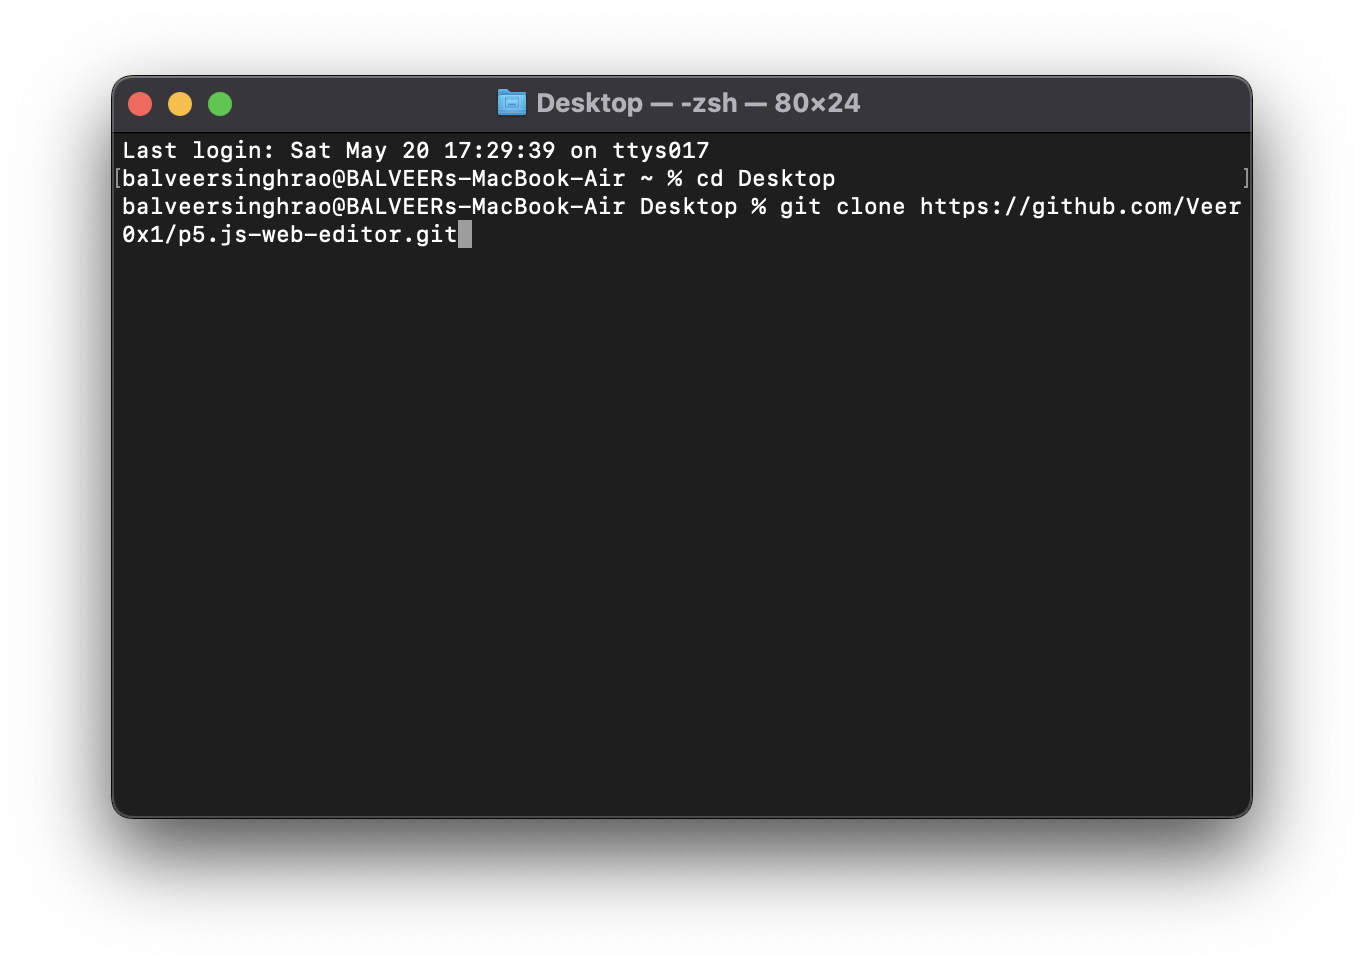
- To make a contribution to a repository you'll first need to create the fork of repository.

- After creating a fork, go to your forked repo and get hold of your forked url by clicking on the green code button

- Open the terminal and clone this repo using the command
git clone <repo_url>, locally. Remember to change to directory(folder) where you want copy of this repo. In my case I want to clone it on Desktop to I changes my direcory using the commandcd Desktop
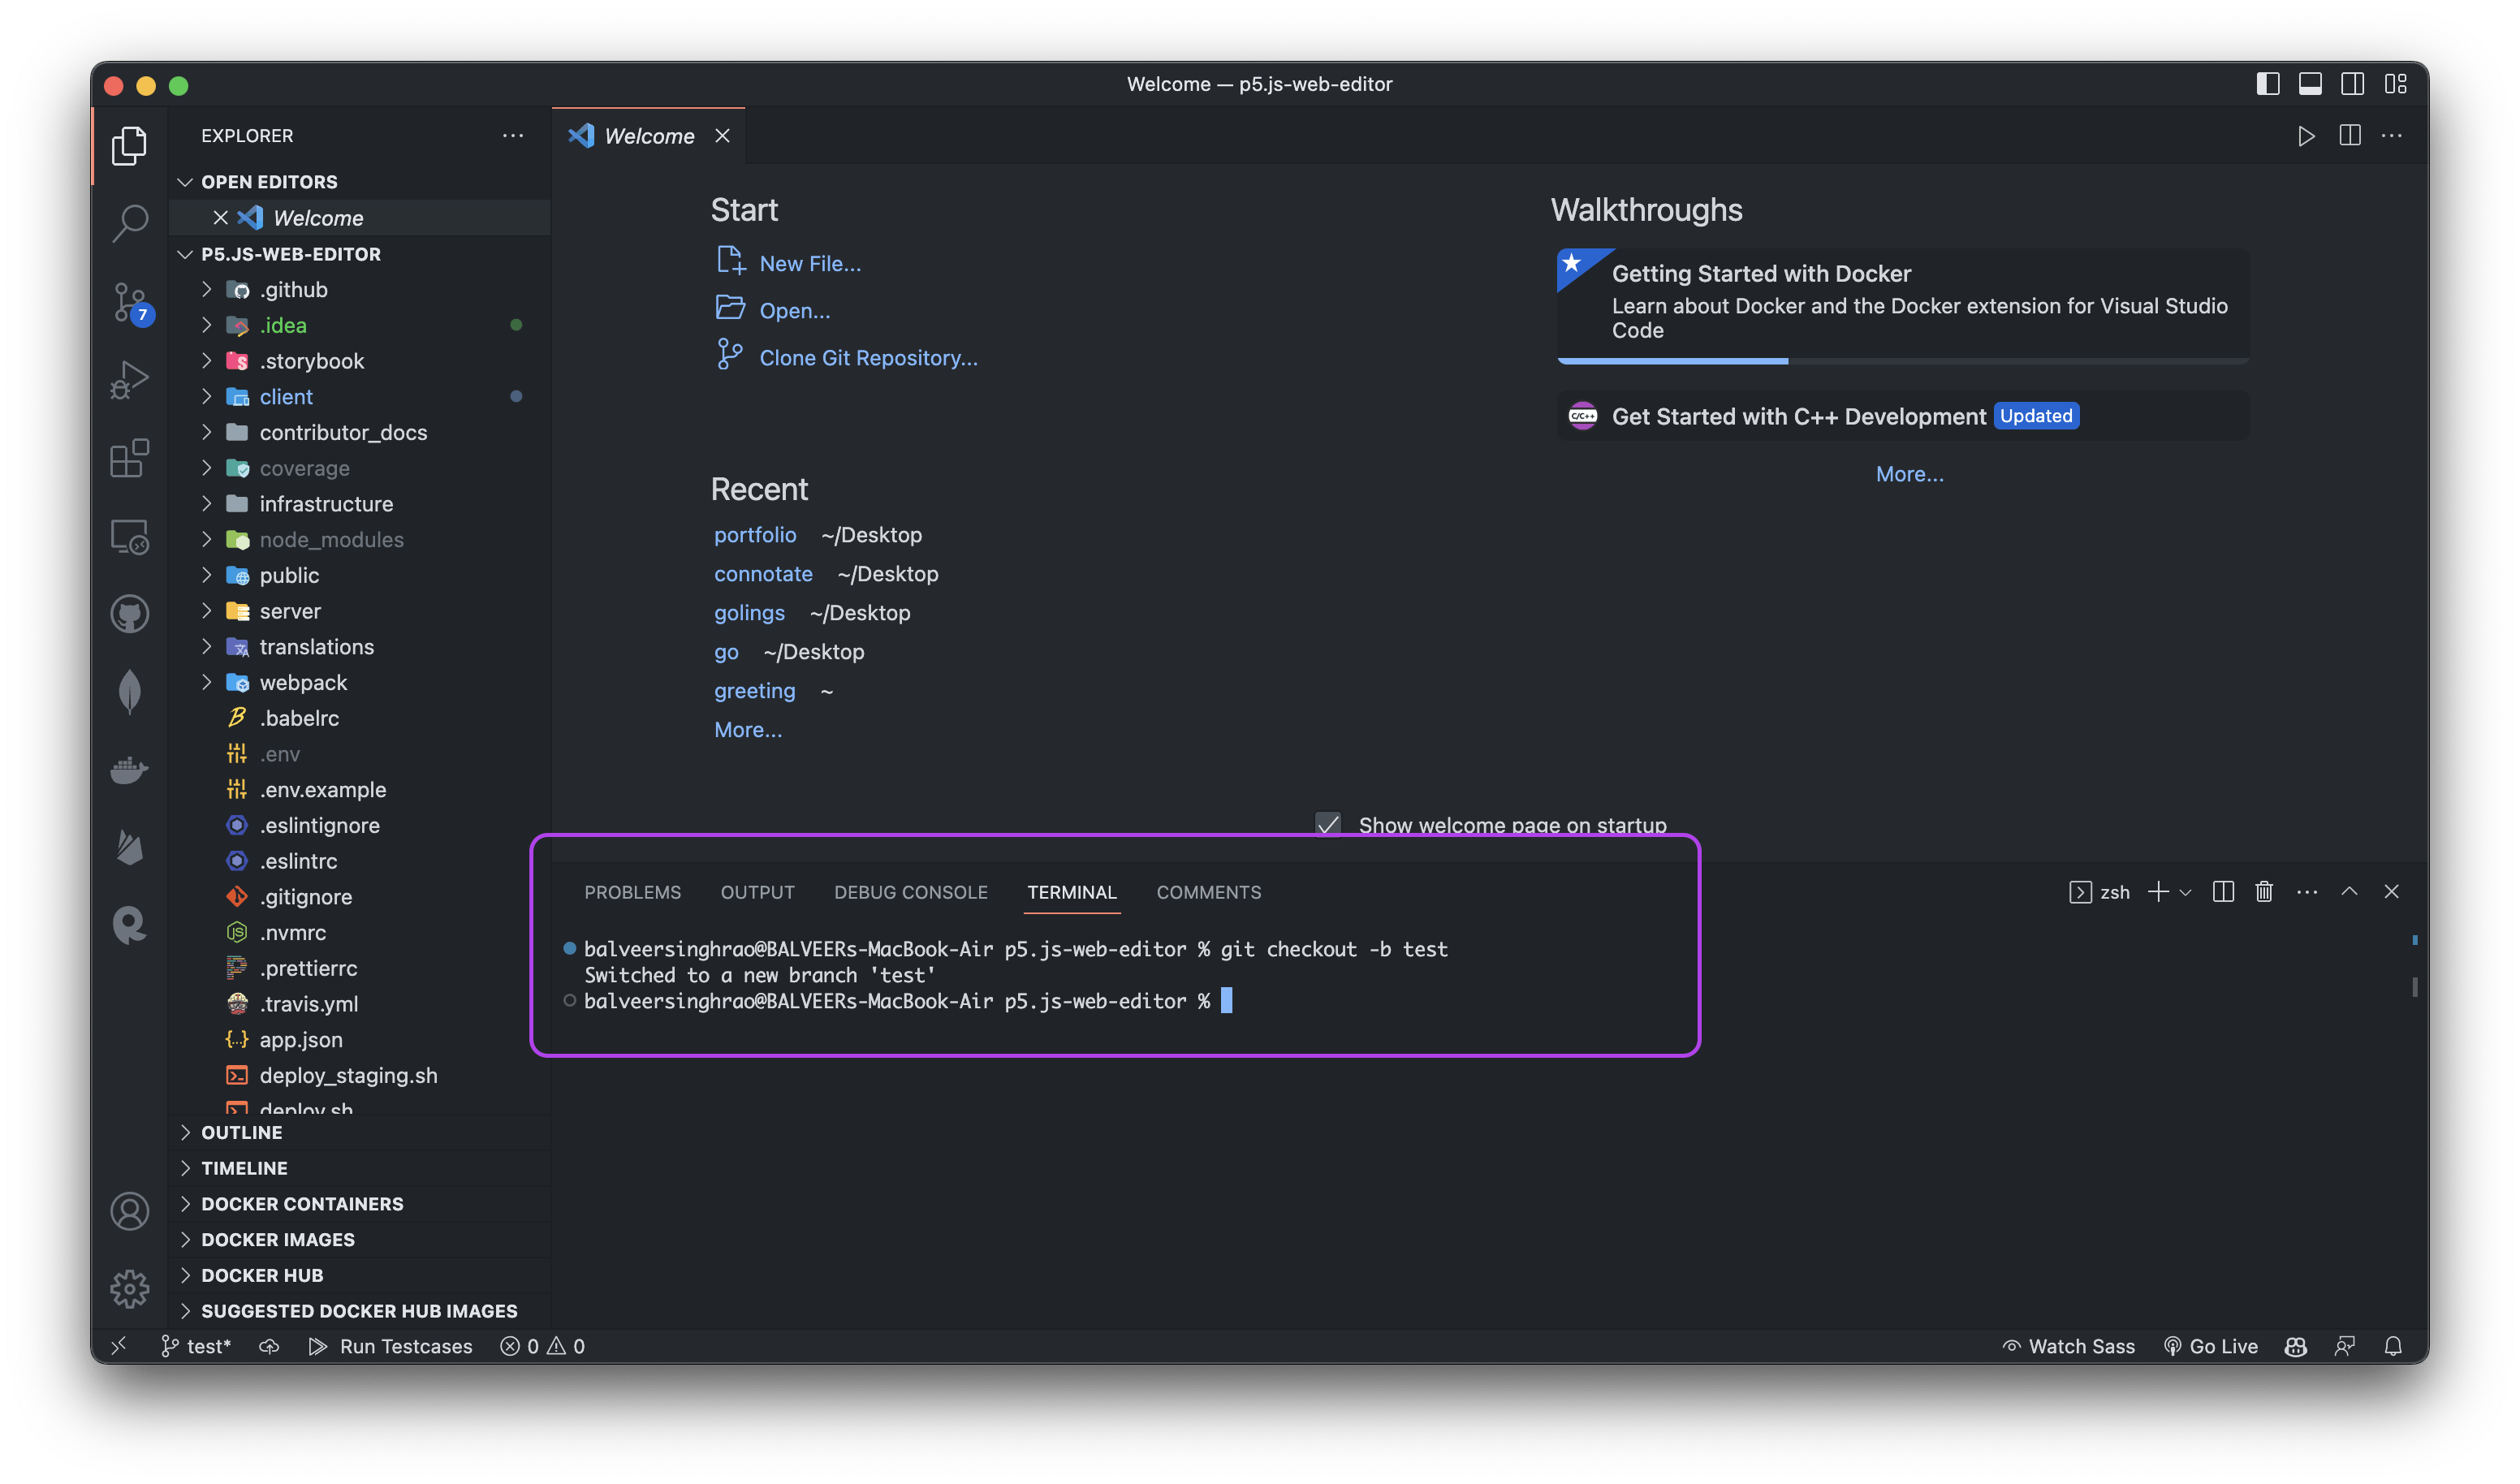
Open the project into your favourite IDE.
Create a new branch using the command
git checkout -b branch_name. This command will create a new branch and will switch to that branch. Raising a pull request from a new branch is a recommended practice in software development for several reasons:Isolation: Creating a new branch allows you to work on a specific feature, bug fix, or enhancement in isolation from the main codebase. It helps prevent interference with other ongoing development work or potentially breaking the existing code.
Version Control: By working on a separate branch, you maintain a clear history of changes, making it easier to track and manage modifications over time. This helps with code review, debugging, and reverting changes if necessary.
Make the neccessary changes which fixes the issue.
Commit the changes. To commit changes you'll need to stage your changes using the command
git add .(In Git, the term "stage" refers to the process of preparing files to be included in a commit)
Then commit your changes using the commandgit commit -m "write your message here"
To confirm you have succesfully commited the changes, log the commit using the commandgit log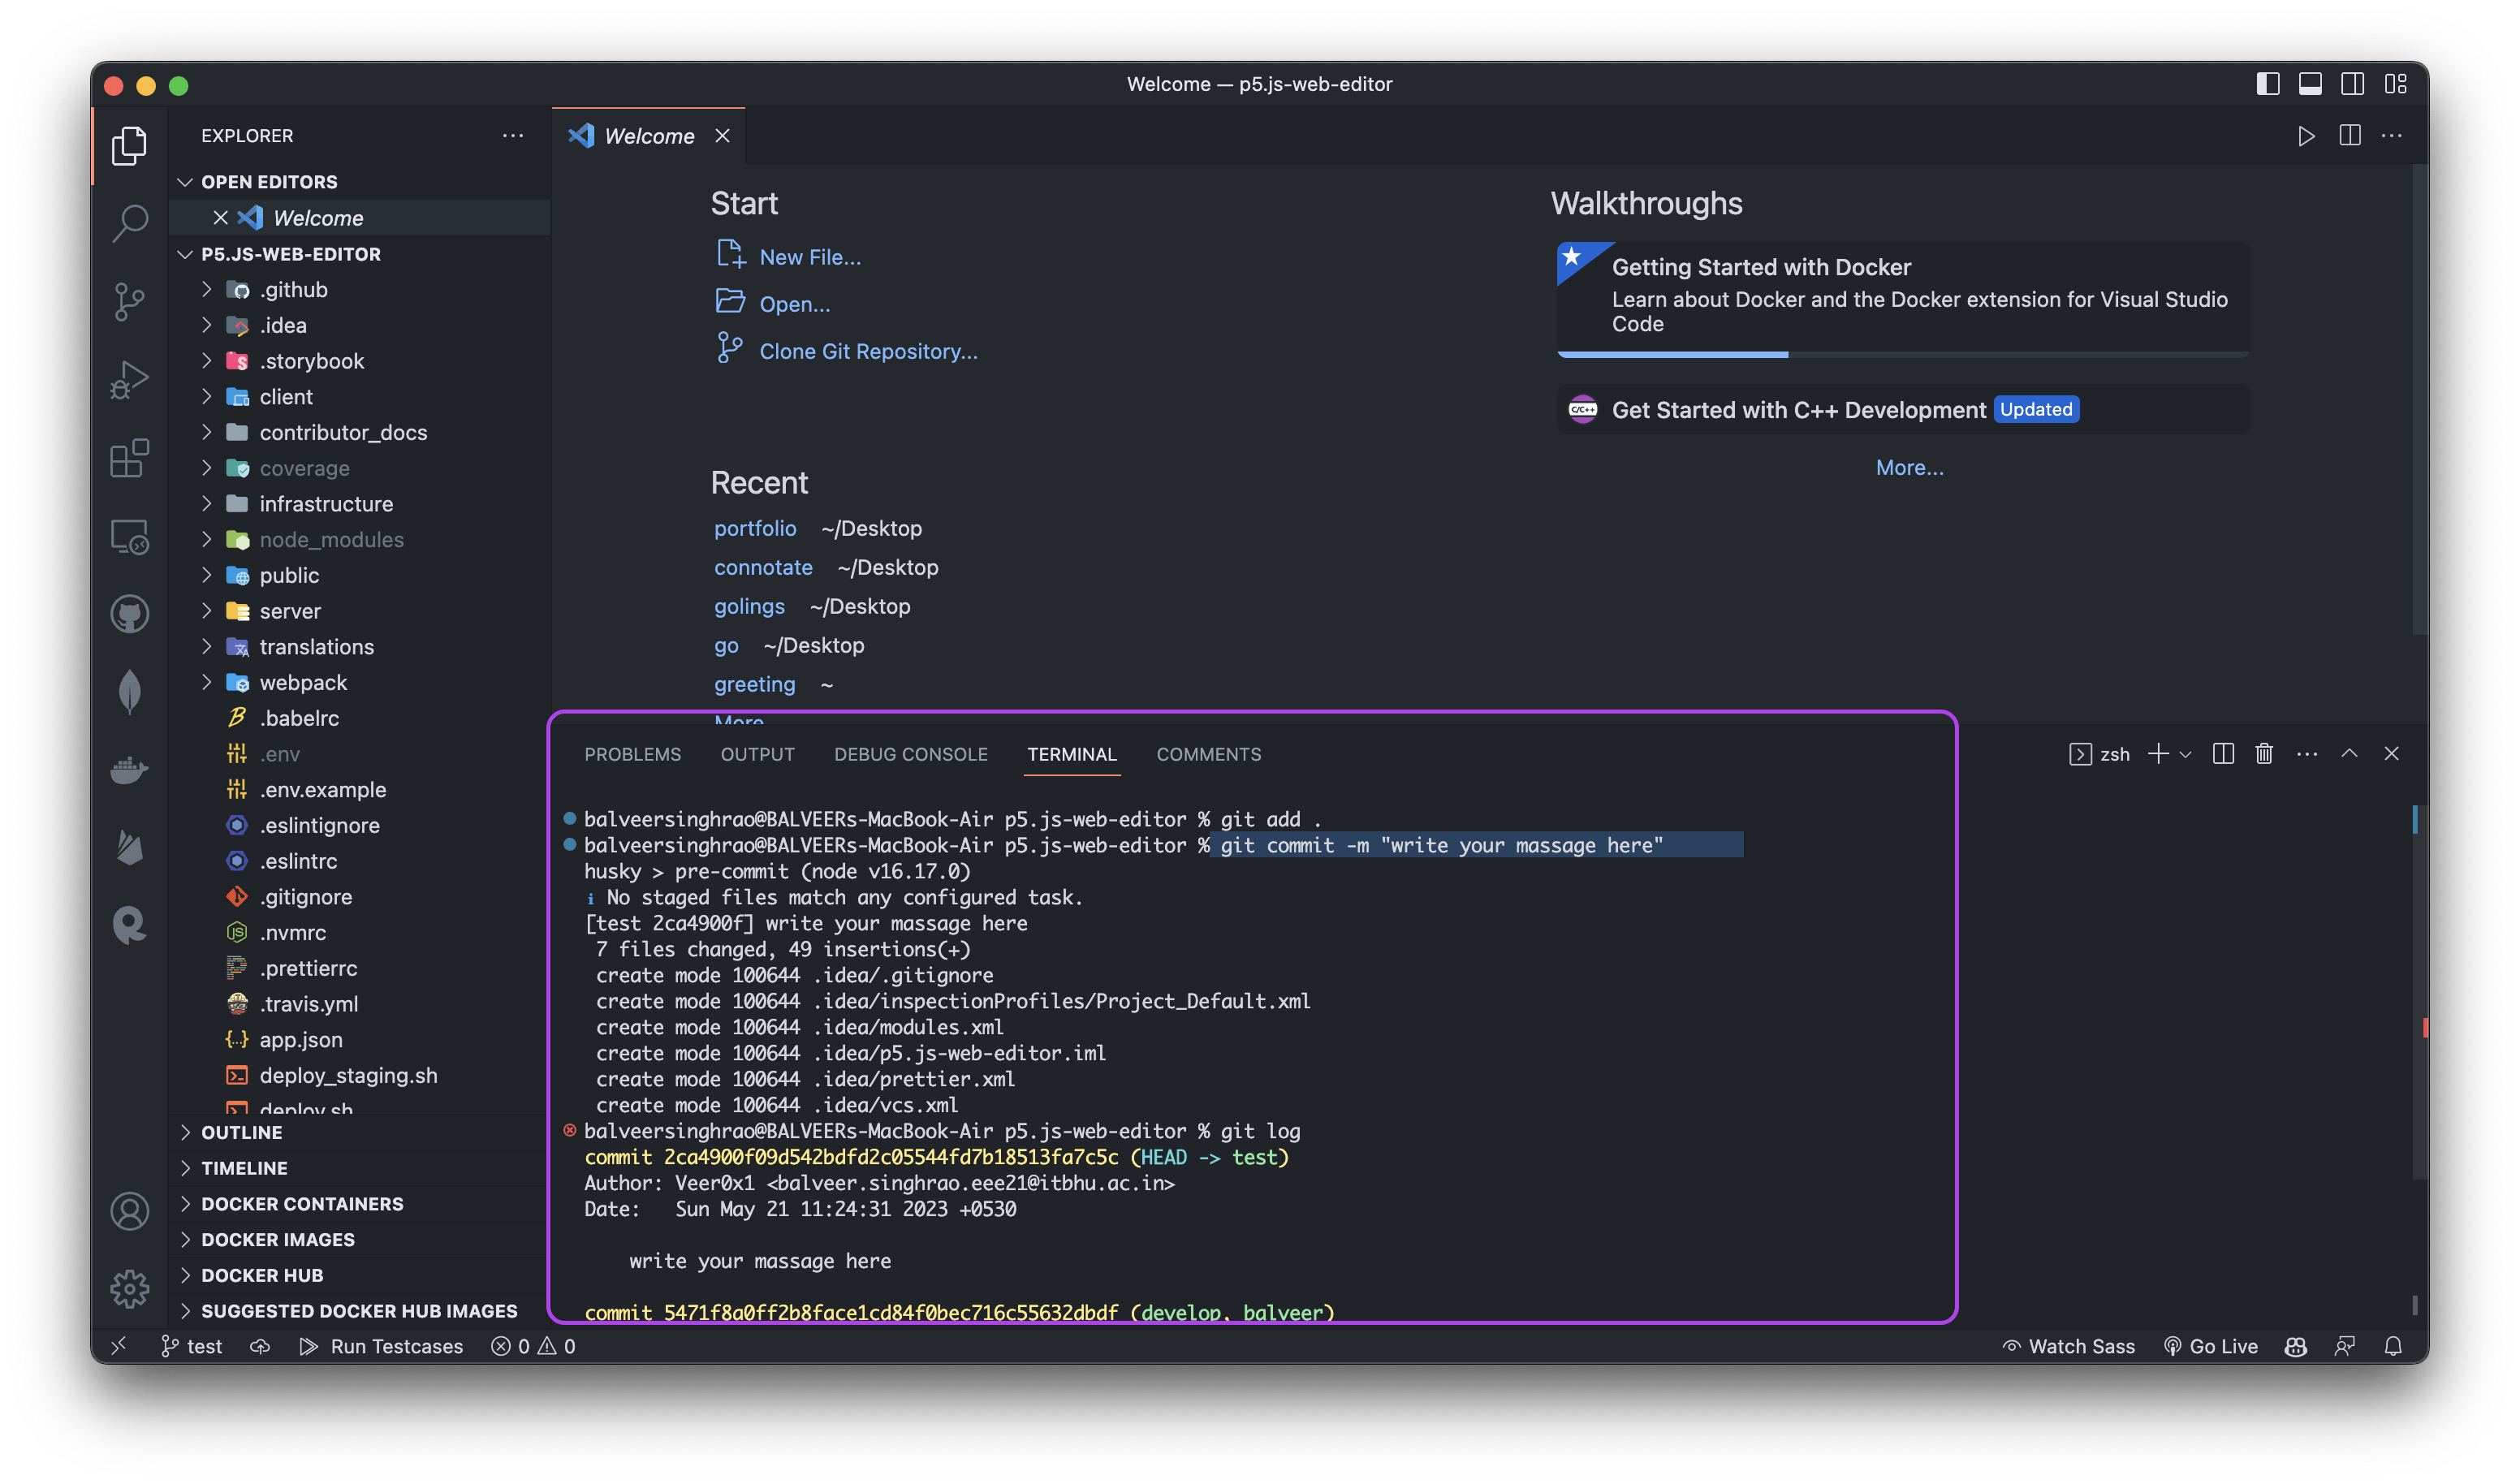
Push the changes to your remote repository ( your forked one ) using the command
git push --set-upstream origin <branch_name>(The command
git push --set-upstream origin testpushes the local branch named "test" to the remote repository named "origin" and sets up a tracking relationship, allowing future pushes and pulls to be streamlined.)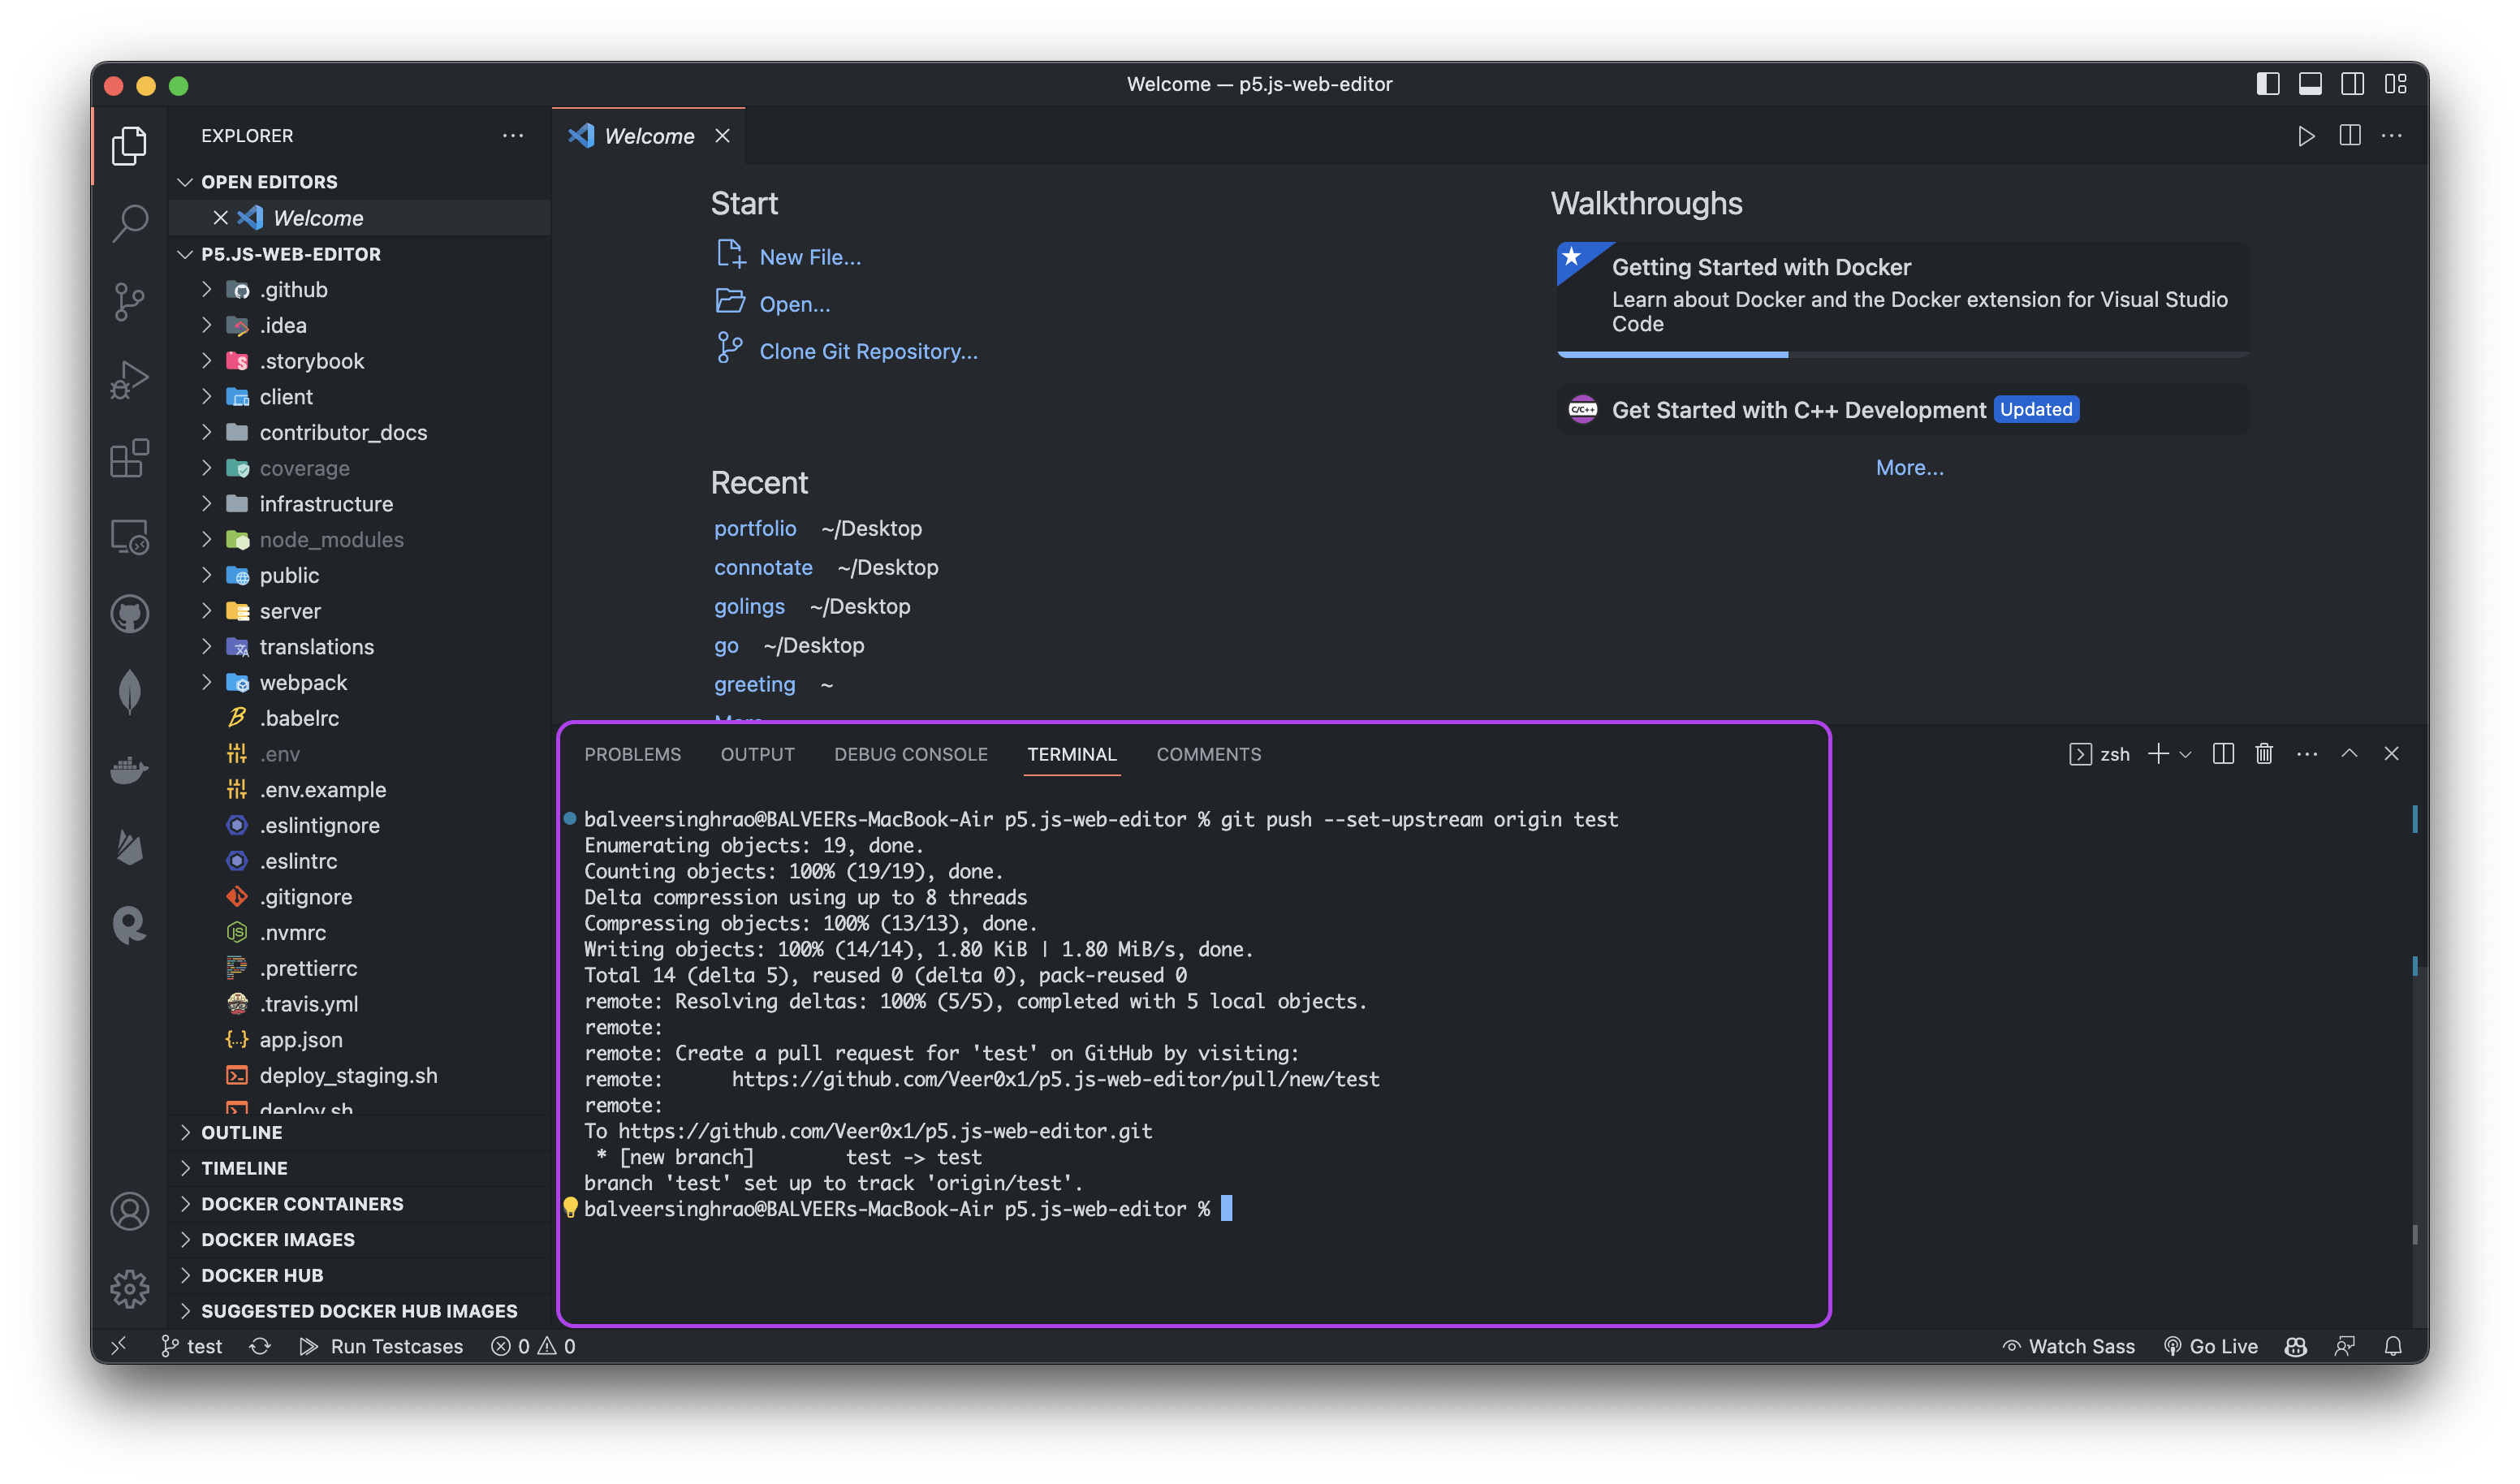
Now go to your remote repository, there you'll see a new button with text "Compare & pull request" click on that button.

After that you'll need to provide certain information about the pull request.
If the pull request solves any existing issue than please mention the issue in description of PR.
If the repo ask you to run certain check on your PR, then go ahead and do that, like this in my case.
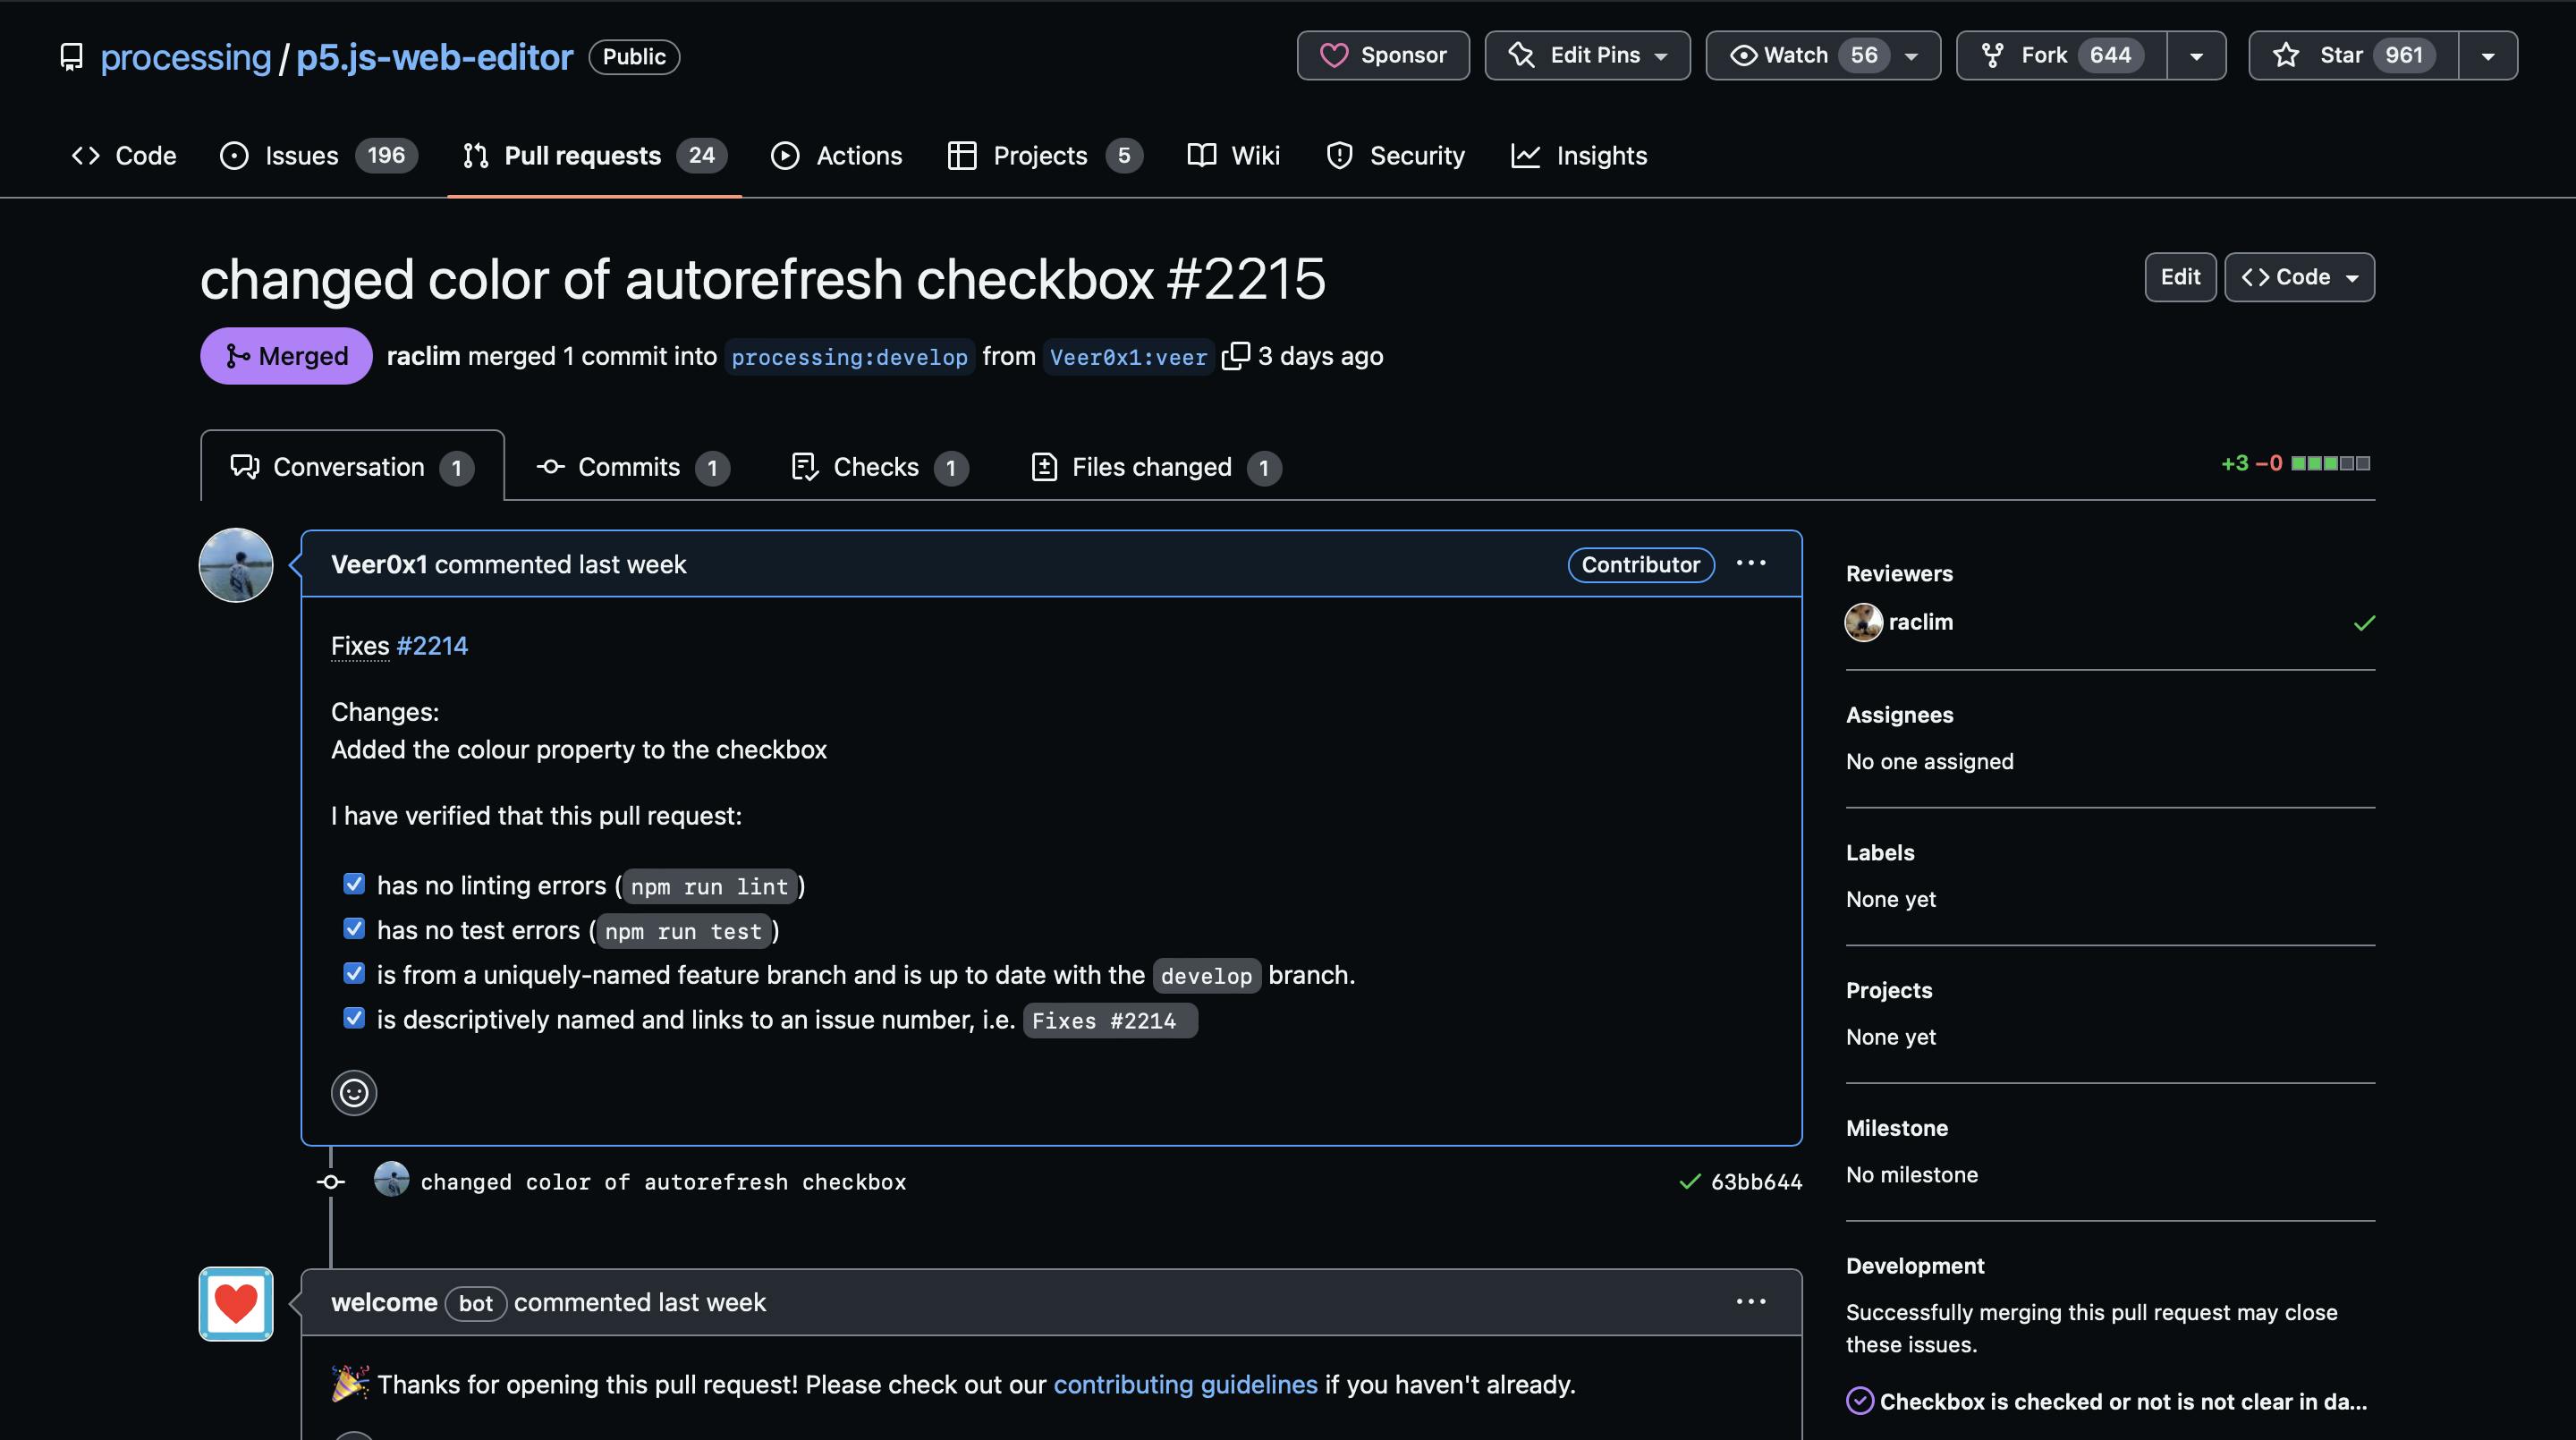
At the end your PR may look like this
If you still have some doubts feel free to ask in comment section